
professional-photography-vs-diy-for-property-listings-expert-tips-and-cost-breakdown

In a crowded property market, your listing photos often decide whether a buyer clicks or scrolls past. This guide compares hiring a professional photographer with shooting your own images, laying out the benefits, typical costs, and practical tips so you can choose the approach that fits your goals and budget. By the end, you’ll know when pro images pay off, how to prepare a home for a shoot, and what to watch for with DIY photos.
Good photography supports every stage of marketing: it sets the thumbnail that drives clicks, supplies images for social posts and virtual tours, and provides the base files you or an agent will use for brochures and online listings. Even small improvements to composition and lighting can materially increase buyer interest, so understanding the trade-offs is useful whether you plan to hire or shoot yourself.
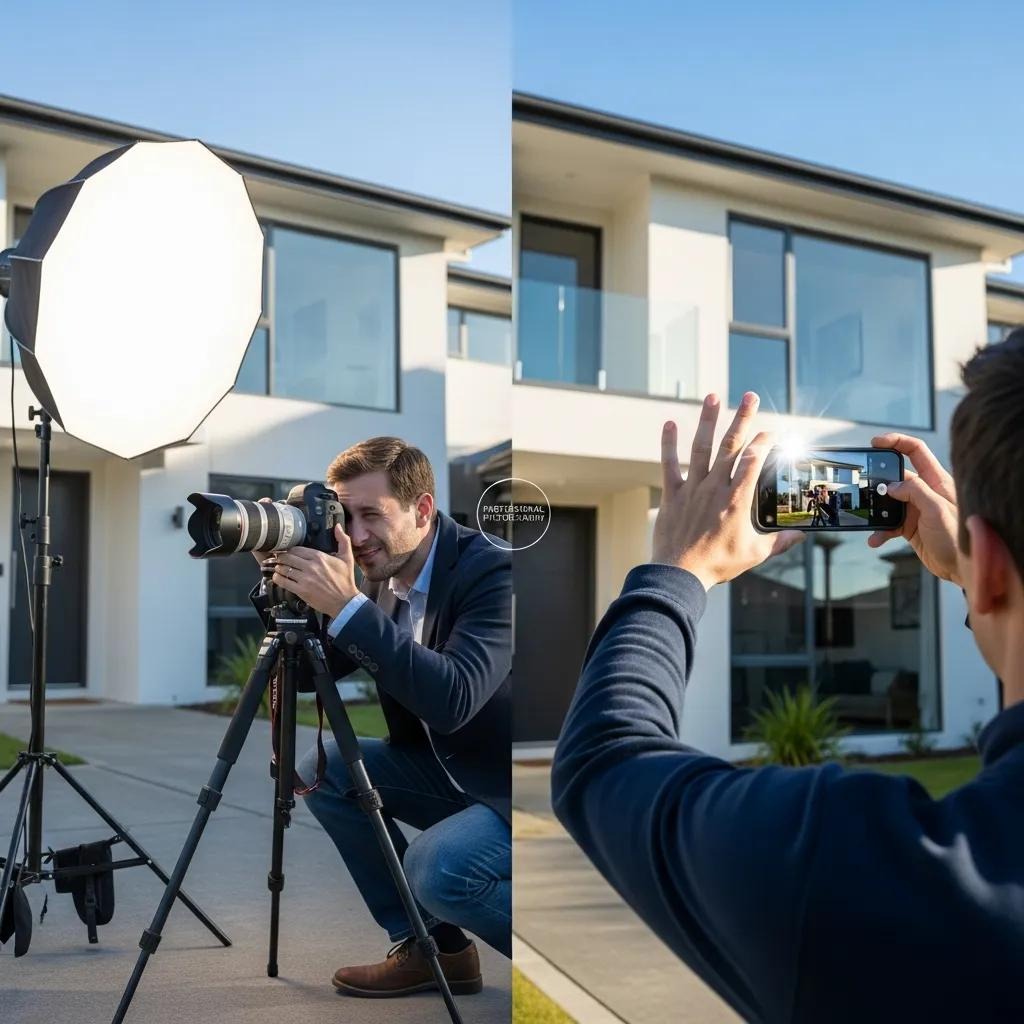
Professional photography means hiring a trained photographer who brings specialised equipment and experience to capture a property at its best. DIY photography puts the camera in the hands of the owner or agent, usually using a smartphone or basic camera. The main difference is in image quality and buyer engagement: professional shots tend to showcase spaces more effectively and attract more interest, while DIY can reduce costs but may miss details that sell the home.
That said, DIY is a practical option for some listings — short-notice rentals, lower-priced properties, or temporary offers where speed matters more than polish. Professionals are generally preferable for mid-to-high-end properties, homes with architectural merit, or listings where presentation directly influences sale price and time on market.
Picking the right photographer matters. Look for a portfolio that matches the look you want and experience in your local market — a photographer who knows local light and buyer expectations will deliver stronger results. Read reviews, ask for sample galleries, and confirm what’s included (edits, drone shots, virtual tours) before you book.
Ask practical questions when comparing photographers: what file sizes and formats are delivered, turnaround times, whether additional retouching is offered and at what cost, and whether the photographer carries public liability insurance for on-site shoots. Request examples that show whole property galleries, not just highlight images, so you can judge consistency.
Small prep steps make a big difference. Declutter, clean, and stage key rooms so spaces feel open and welcoming. Open curtains and turn on lights to maximise natural and ambient light. Little fixes — fresh towels, a tidy bench, trimmed lawns — help the camera focus on the home’s strengths.
Room-by-room tips: in living areas, remove excess ornaments and hide cables; in kitchens, clear benches and show a few purposeful items (a bowl of fruit, a vase); in bedrooms, use neutral bedding and remove personal photos; in bathrooms, clear products and fluff towels; for exteriors, tidy paths, mow lawns, and ensure outdoor furniture is arranged to suggest usable space. These straightforward steps improve composition and reduce the need for heavy retouching.
Knowing basic terms helps you work with the photographer. Lighting, composition, and angle choices change how a room reads on screen. Wide-angle lenses can make rooms look more spacious, and balanced lighting highlights architectural details. Having this vocabulary ensures you get the shots you need.
Also discuss technical approaches: whether the photographer uses HDR or exposure bracketing for strong windows, how they manage white balance for accurate colour, and whether they shoot straight-on perspectives for floor plans vs. angled shots for atmosphere. Understanding these choices helps you interpret proofs and request edits that align with your marketing goals.
Weighing costs means looking beyond the headline price. Factor in immediate fees, any add-on services, and the time you’ll spend shooting and editing if you go DIY.
Extra costs to consider include rapid turnaround or evening shoots, drone operator fees, virtual staging, floor plans, and the need for additional retouches. For DIY, account for the time invested in learning, multiple takes, and standard editing tasks such as exposure and perspective correction.
Professional packages typically range from $200 to $500, depending on what you include. Basic shoots cover interior and exterior photos; premium packages may add drone shots, twilight photos, floor plans, or virtual tours and more extensive editing. Choose the package that aligns with your listing goals.
When evaluating packages, confirm how images are delivered (high-resolution originals and web-sized versions), usage rights for marketing, and whether the price covers multiple visits or re-shoots if needed. Bundling photography with video, floor plans or virtual tours can often deliver better per-item value on higher-end listings.
DIY can look cheaper up front, but don’t forget hidden costs: buying or upgrading equipment, learning to shoot and edit, and the hours you’ll invest. A smartphone can capture decent images, but the time and polish a pro brings are often harder to replicate.
If you plan to DIY, start by auditing what you already have: many modern phones produce acceptable results with the right approach, but add a small tripod, a wide-angle clip or lens, and basic editing software to improve outcomes. Budget time for practice shoots and reviewing images on a larger screen to confirm framing and exposure.
Hiring a professional brings measurable benefits for many sellers.
There are trade-offs to consider when hiring a pro.
DIY also has clear upsides for certain sellers and agents.
DIY isn’t without drawbacks.
Professional real estate photography elevates a listing by presenting the home clearly and attractively. Better images can lead to stronger first impressions, potentially higher offers and faster sales — a visible advantage in competitive markets.
Beyond immediate listings, a consistent professional look supports brand recognition for agents and builds trust with prospective buyers who expect high-quality marketing from established sellers and agencies.
Great photos create an emotional connection that helps buyers picture themselves in the space. Professional images emphasise warmth, flow and proportion, which encourages more viewings and deeper engagement with the listing.
Photographers also sequence galleries to lead viewers through a property logically: exterior and entry shots first, followed by feature rooms, outdoor living and then supporting images. This visual narrative helps buyers form a coherent impression quickly when browsing multiple listings.
While striking visuals are important, research suggests the words you use in a listing can sometimes have an even greater effect on whether buyers book a viewing.
Real Estate Listing Images: Impact on Homebuyer Visits
Using signalling theory, this study compares how images and descriptive language influence a buyer’s decision to move from reading a listing to visiting a property in person. The authors find agents’ typical wording is usually interpreted as intended. After accounting for demographics, experience, and empathy, the study reports that positive wording alone can have a larger effect on the likelihood of a visit than a high-quality photo or the type of home.
Listing agent signals: Does a picture paint a thousand words?, KF Luchtenberg, 2019
Professional images accelerate sales by highlighting a home’s best features and creating buyer urgency. Listings with polished photos attract more attention, generate stronger enquiry rates, and often spend less time on market.
Strategically timed images — twilight shots to show outdoor lighting, or aerials that reveal property orientation — can create emotional triggers that encourage quicker enquiries and earlier inspections, which in turn can shorten marketing timelines.
DIY photography can work for simple or low-cost listings, but it usually falls short of pro results in terms of polish and consistency. Professionals bring gear, experience and editing that lift a listing above the competition.
If you choose DIY, aim for consistency: use the same editing presets across images, match colour and exposure, and maintain a consistent horizon and perspective so the gallery reads as a single coherent presentation.
DIY techniques include using natural light, shooting from varied angles, and basic editing. Common pitfalls to avoid are poor lighting, cluttered rooms, and awkward angles that make spaces look smaller or misrepresent the layout.
Practical DIY tips: use a tripod or stabiliser for sharp images; level the camera to avoid converging verticals; shoot with windows balanced by adjusting exposure or using fill light; and take multiple frames for each composition so you can choose the best. Correct perspective and lens distortion during editing to avoid the 'bulging' or 'leaning' look common with cheap wide lenses.
Yes — DIY photos can sell a property, especially in certain markets or price points. That said, professional photos tend to attract more serious buyers and better offers, so weigh the savings against the potential impact on sale price and speed.
DIY works best when the property is already well-presented, the market is fast-moving, or the listing is priced to attract volume interest rather than to demand top-market bids. If you plan to DIY, test your images on a variety of screens (phone, tablet, laptop) to ensure they perform well where buyers actually view listings.
Hiring a property photographer typically costs between $200 and $500 depending on package and add-ons. DIY may seem cheaper initially, but factor in equipment, editing time and potential missed value from lower-quality images.
Consider negotiating with photographers on recurring work or multiple listings: agencies and frequent users can often secure package pricing, while a single one-off listing may carry a higher per-property cost. Always compare what is delivered for the price rather than the headline number alone.
Packages vary by number of images, editing level, and extras like drone shots or virtual tours. Basic packages often start around $200 while premium bundles with extras can reach $500 or more. Match the package to the property and target buyer.
When comparing packages, ask about licensing for marketing use, the number of reworks allowed, how many interior versus exterior shots are included, and whether virtual staging or floor plans are added. These details determine real value more than the headline price.
Agents should balance upfront photography costs against likely returns. Higher-quality photos often lead to faster sales and stronger offers, which can more than cover the initial expense and boost an agent’s market reputation.
To judge the trade-offs, estimate the time saved, the potential uplift in buyer interest, and any incremental effect on sale price or time on market. Tracking performance across listings where a pro was used versus DIY helps build a practical benchmark for future decisions.
To judge the financial trade-offs fairly, it helps to think in terms of a simple cost-benefit analysis.
Understanding Cost-Benefit Analysis for Property Listings
Cost-benefit analysis systematically lists and compares all costs and benefits — including non-monetary ones — then discounts future values to estimate a net effect. This approach clarifies whether an investment, like professional photography, is likely to deliver a positive return (Boardman et al. 2018).
Cost-benefit analysis, 2025
Photo quality matters: listings with professional images typically receive more views and enquiries, which often shortens time on market and may increase final sale prices. Studies show high-quality photos can translate into meaningful financial gains for sellers.
Quality images reduce buyer uncertainty by showing accurate space, scale and condition. When photos clearly reflect the property rather than obscure it, buyers are likelier to proceed to inspection, reducing wasted enquiries from poorly represented listings.
Recent data indicates listings with professional photography sell faster — in some reports up to 32% quicker — and can achieve higher prices, with increases of around 20% cited in select studies. These ps highlight why many sellers view photography as an investment.
Interpreting such ps requires care: results depend on market conditions, listing price, and how other marketing channels are used. Use those data points as directional evidence rather than guarantees for any single property.
Agents who use high-quality photos often see more enquiries and stronger offers, which improves listing performance and client satisfaction. Over time, consistent presentation helps build an agent’s brand and referral pipeline.
Maintaining a consistent visual standard across listings signals professionalism to both sellers and buyers. Agents that standardise photography quality can streamline marketing workflows and set clearer expectations for clients.
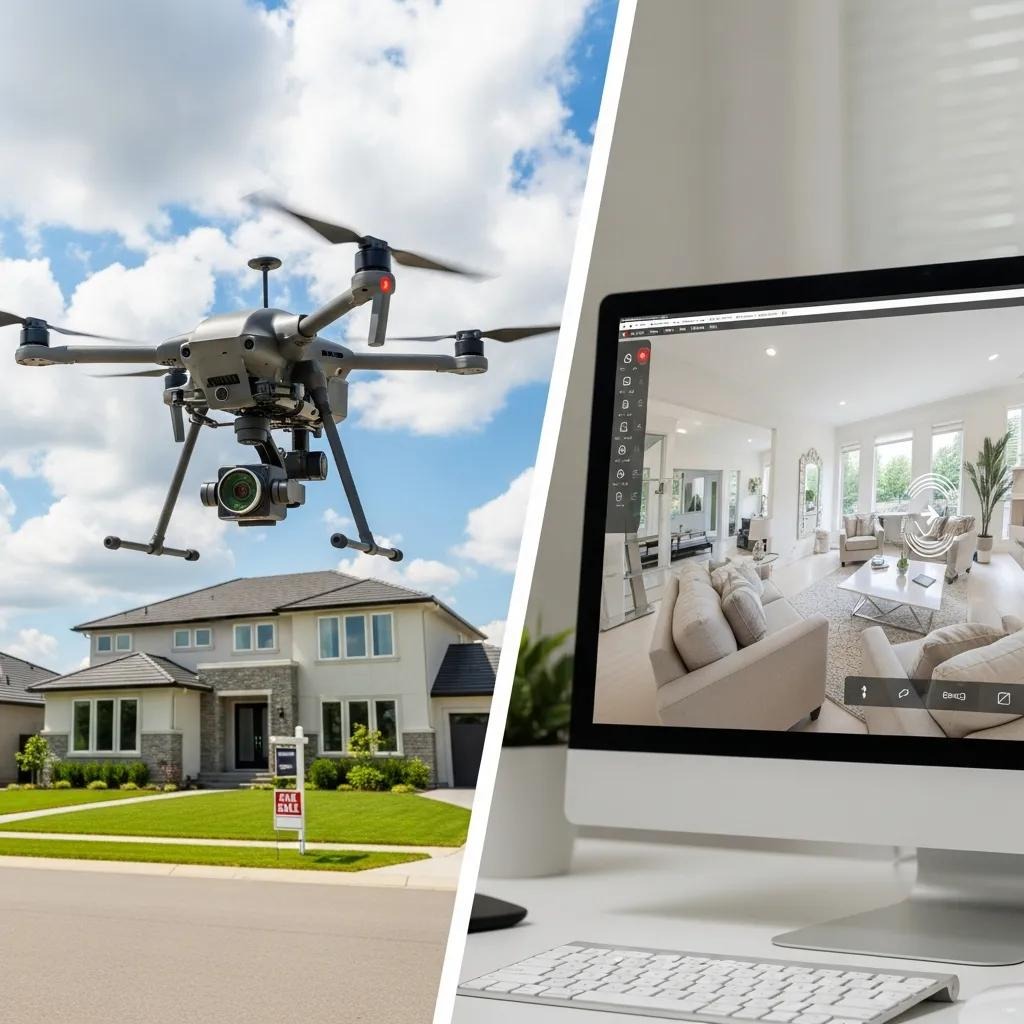
New tools like drones and 360-degree imaging are changing how properties are presented. Drones offer aerial perspectives that show land, orientation and neighbourhood context; 360-degree tours let buyers explore a space remotely — both add depth to a listing and improve buyer engagement.
Other advances include floor-plan integrations that sync plan layout with gallery images, and faster web-ready exports for listing portals. These additions allow buyers to evaluate a property more fully before seeking an inspection, improving lead quality.
Drone shots capture scale and setting, while virtual staging digitally furnishes empty rooms to help buyers imagine possibilities. Together these techniques can raise perceived value and broaden a listing’s appeal without the cost and logistics of physical staging.
Virtual staging is particularly useful for vacant properties where empty rooms can feel cold; it demonstrates realistic furniture arrangements and shows potential room use without committing to physical decor. Drone imagery is valuable for larger lots, properties with notable views, and locations where surrounding amenities add tangible value.
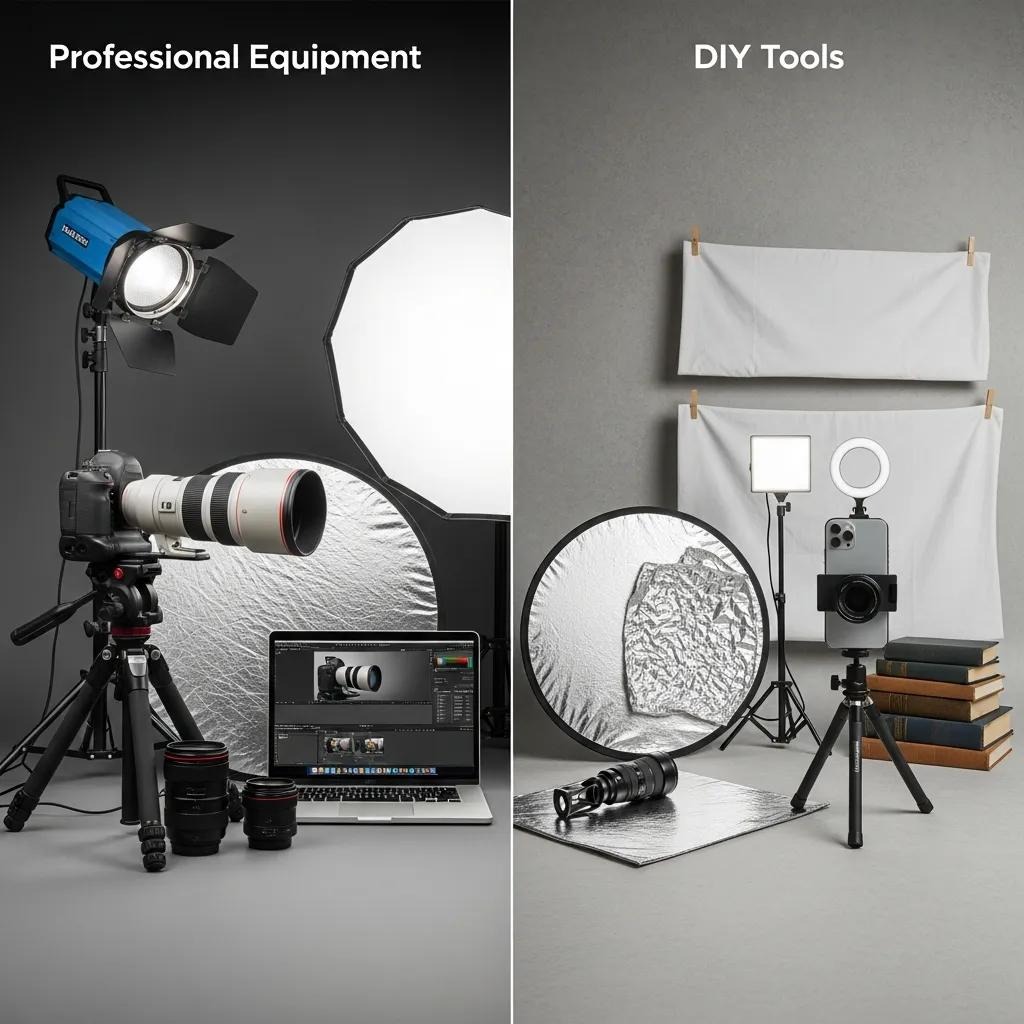
If you go DIY, choose the right tools: a DSLR or mirrorless camera with a wide-angle lens is ideal for interiors, and a tripod stabilises shots. For editing, Adobe Lightroom and Photoshop are industry standards for exposure, colour and retouching — learning basic workflows in these programs will noticeably improve your images.
Smartphone users can improve results by using HDR or exposure-lock features, shooting in landscape orientation, and stabilising the phone with a small tripod. Basic editing apps can correct perspective, adjust exposure and straighten horizons; exporting web-sized images with appropriate compression maintains quality while meeting listing platform limits.
Drone photos give buyers a sense of the property’s size, layout and surroundings in a way ground-level shots cannot. They highlight yards, roof condition, nearby amenities and neighborhood context, often making listings more compelling and attracting more interest.
Also consider safety and compliance: drone operators should be licensed where required and follow local regulations about where and when drones can fly. Ask your photographer about permissions and insurance before booking an aerial shoot.
Virtual staging digitally adds furniture and decor to empty rooms, helping buyers visualise how spaces can be used. It’s a cost-effective alternative to physical staging and can make listings feel warmer and more move-in ready, increasing enquiries.
Use virtual staging sparingly and honestly: choose neutral furnishings that reflect the target buyer profile, and be transparent about staging in the listing if local rules require it to avoid buyer disappointment later.
Avoid low light, clutter, and awkward angles. Don’t shoot with lenses tilted or from eye level when a higher vantage point would show layout better. Clean and declutter first, use natural light where possible, and stabilise the camera for sharp images.
Other common errors include inconsistent editing across images, failing to correct perspective, and over-saturating colours. Review galleries on multiple devices to check how images render before publishing.
Quality photos are more likely to attract clicks and enquiries. Higher-quality visuals help listings stand out, shorten marketing time, and — in many markets — lead to stronger offers. Investing in good images pays off in visibility and buyer confidence.
Adobe Lightroom is great for batch edits and correcting exposure, colour and clarity; Photoshop is useful for advanced retouching and removing minor distractions. Together they cover most needs for professional-looking real estate images.
If you prefer simpler tools, several consumer apps provide perspective correction, cropping and basic retouching suitable for listing images — those can be sufficient when paired with careful shooting technique.
Lighting sets mood and clarity. Natural light is usually the best choice for interiors; aim for soft, even light by shooting mid-morning or late afternoon. Use artificial lights to fill shadows and highlight features, and avoid mixed colour temperatures that create uneven tones.
Balance interior lights and exterior window exposure by using a combination of natural light and controlled artificial light, or by shooting bracketed exposures and blending them in post-processing to preserve detail both indoors and out.
Declutter and clean all rooms, stage key areas (living room, kitchen, master bedroom), open curtains, switch on lights, and remove personal items that distract. Small repairs and tidy landscaping also improve the impression your photos make.
Create a short checklist for the photographer: indicate where feature shots should be taken, any items you want highlighted (recent renovations, fixtures), and whether pets should be present or absent. Clear communication reduces reshoots and ensures the shoot focuses on value-driving aspects of the property.
For most mid-to-high-end listings and competitive markets, hiring a professional is a smart investment: it improves listing appeal and often speeds up the sale. For low-cost or time-sensitive listings, DIY can suffice if executed well.
Consider a hybrid approach if you’re unsure: hire a pro for a main shoot and update a few images yourself for last-minute changes or seasonal refreshes. This balances cost and consistency while keeping content current.
In Brisbane, expect typical photography fees between $200 and $500 depending on package inclusions and extras like drone work or virtual tours.
Costs vary by experience, turnaround times and additional rights. Always compare final deliverables — what you receive and how you can use the images — rather than selecting purely on price.
Agents should invest where it counts: use pro photography for key listings, prepare homes before shoots, and maintain a consistent visual style across listings to build trust and recognition with buyers.
Standardise formats and file naming so galleries are easy to upload across portals, and keep an archive of master images for reuse in brochures, social media and client reports. Establishing a regular workflow with a preferred photographer can also improve speed and consistency.
Use high-quality photos to create a strong first impression—lead with standout images, optimise thumbnails for listing platforms, and pair photos with clear, positive descriptions to encourage viewings.
Test which images perform best as lead thumbnails and use those consistently across ads and emails. Swap images in active listings to refresh interest, but keep the overall gallery coherent so buyers recognise the property each time it appears.
Brisbane has several specialist real estate photographers offering a range of packages. Review portfolios, check local reviews, and compare what each package includes to find a provider that fits your needs and budget.
Local property groups and agent networks are often a good source of referrals; ask colleagues which photographers deliver reliable turnaround and consistent quality for similar property types in your area.
AND Photography specialises in Brisbane property imagery, combining local market knowledge with professional equipment and editing to create listings that perform. Their local focus and consistent quality make them a popular choice for agents and sellers.
When evaluating any provider, look for clear sample galleries that match your target buyer, transparent pricing, and a standard process for communication and revisions. That combination typically yields the best outcomes for property marketing.
Review portfolios, confirm style and deliverables, ask about turnaround times and revisions, and read client reviews. The right fit balances technical skill with a visual style that matches your target buyers.
Ask to see full galleries from recent shoots rather than single hero images; this reveals how consistently the photographer represents entire properties and handles everyday rooms, not just standout spaces.